Uploading your components to the AI on Demand platform#
To deploy the pipeline using the AI on Demand platform you will need to upload each of the components to the website, but first, you will need to create an account.
Creating an account#
visit the website https://aiexp-dev.ai4europe.eu/#/home
click “sign up” and sign up using the option that best suits you
make sure to sign in before moving on to the next step
Uploading the components#
click the “On-Boarding Model” button in the menu on the left-hand side. You should see a page like in the picture below:
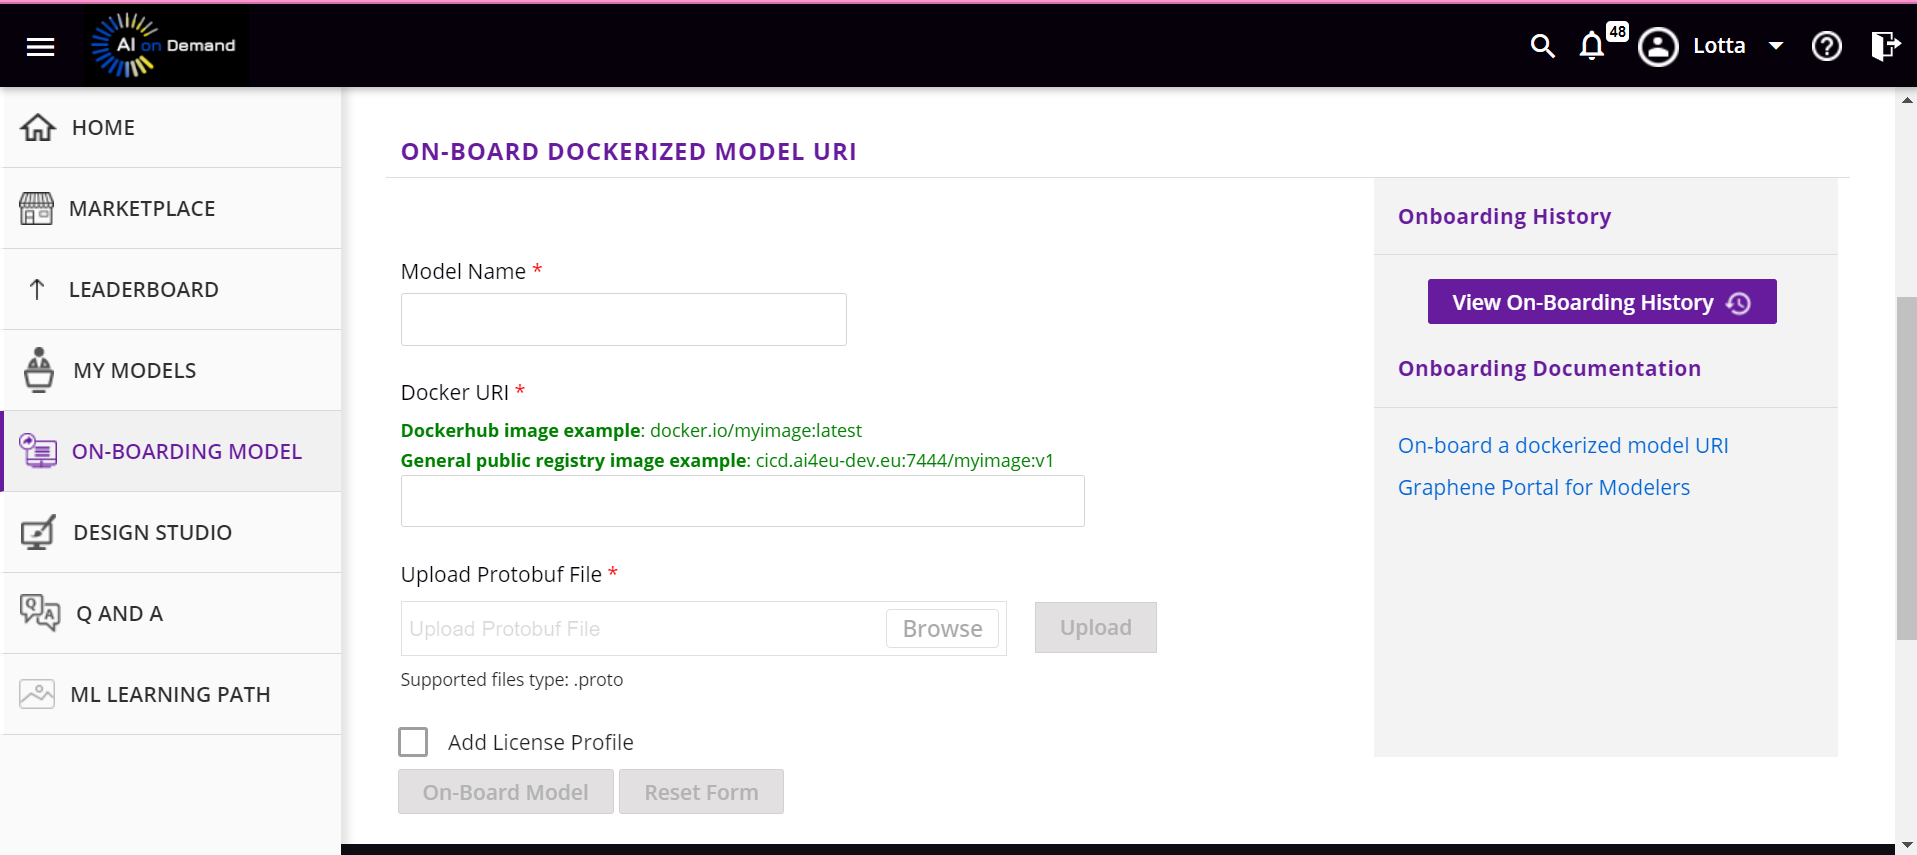
Model name: When naming deployment models, it is essential to adhere to DNS name conventions to ensure compatibility and proper functionality within networked systems. DNS names must comply with several key conventions: they should be composed of alphanumeric characters (A-Z, 0-9) and hyphens (-), with no spaces or special characters. Each label (i.e., segments separated by dots) must be between 1 and 63 characters long, and the entire domain name should not exceed 253 characters. Additionally, DNS names are case-insensitive, meaning “MODELNAME” is equivalent to “modelname”. Proper adherence to these conventions ensures that names are valid and avoid conflicts, allowing seamless integration and resolution within networked environments.
Make sure the name is not too long, try to keep it short and descriptive. For example, the stock price prediction pipeline’s data component could be named spp-data
Docker URI To effectively reference and manage Docker images, you must use a Docker URI, which specifies the location of the image in a repository. The URI follows the format repository/image_name:tag, and should match what you used when pushing the image to dockerhub. If you are unsure, you can find the correct URI through the docker hub. Visit https://hub.docker.com/ and log in. Navigate to your repositories through the menu at the top left. Click the image you’re interested in. On the right side, you should see something resembling the image below.
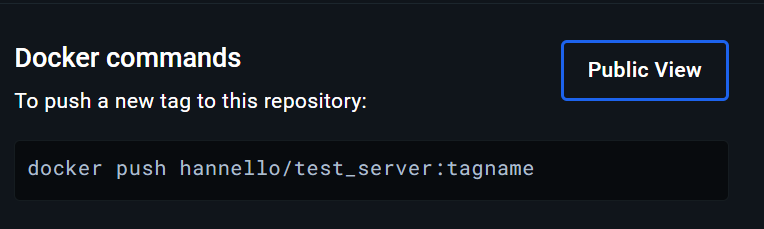
The part hannello/data_server:tagname is the part you need to copy and enter into the Docker URI field. Make sure you use the tagname that matches your latest push to the docker hub.
Upload protobuf file As mentioned in the documentation for the AI on Demand platform:
Each model must expose the public interface via gRPC defined in Protobuf. The .proto file must be uploaded into AI4EU Experiments because it is needed to connect only matching model ports in the design studio.
Choose the protofile that corresponds to the component you are uploading, and make sure to press the purple button with the text “upload”.
Add License profile: If you wish to publish your components or final model you will need to upload a license profile. You can use the templates provided or write your own file. This is however not necessary if you do not want to publish.
On-board Model Once you have filled out all the mandatory fields you can on-board the model. Click the “On-Board Model” button at the bottom of the page. Wait until you receive confirmation of successful onboarding. Once the first component has been successfully on-boarded, you will have to reload the page and on-board the other components.
Below you can see a video of the full onboarding process:
Once all components have been onboarded you can move on to the deployment.